Contents
6.1. LAMP+WordPress环境
LAMP = Linux + Apache + Mysql + PHP

可以全部部署在1台服务器上
也可以分离Mysql数据库进行部署
Apache和PHP需要在同一台机器上,因为PHP是作为Apache的一个模块存在的
6.1.1. 更多LAMP部署参考
Lamp https://www.cnblogs.com/f-ck-need-u/p/7642992.html Lamp http://www.apelearn.com/study_v2/chapter17.html
6.1.2. LAMP与WordPress概述
LAMP是一组构建Web应用平台的开源软件解决方案,它是一个开源套件组合。
其中,“L”指的是Linux(操作系统),“A”指的是Apache HTTP服务器,“M”指的是MySQL或者MariaDB,“P”指的是指Perl或Python。
这些开源软件本身都是各自独立的程序,但是因为常放在一起使用,拥有了越来越高的兼容性,所以,就用 LAMP 这个术语代表一个 Web应用平台解决方案。
在CentOS 7之前,LAMP就代表Linux、Apache、MySQL和PHP。
而随着CentOS 7系列发布的发布,由于CentOS 7中MySQL被MariaDB了,那么LAMP随之就变为Linux、Apache、MariaDB和PHP。
本节就在CentOS 7.1环境下介绍LAMP环境的搭建过程。
WordPress是一个免费的开源项目,在GNU通用公共许可证下授权发布。它使用PHP语言和MySQL数据库开发,最初是一款个人博客系统,目前已逐步演化成一款内容管理系统软件。
WordPress是世界上使用最广泛的博客系统,
因为使用者众多,所以WordPress社区非常活跃,有丰富的插件模板资源,易于扩充功能,安装、使用都非常方便。
这里我们想通过LAMP平台搭建一个WordPress网站系统,后台使用MariaDB数据库,并且使用phpMyAdmin管理数据库,
同时使用独立域名www.ixdba.net进行访问。下面介绍这个过程。
1.安装并配置Apache
安装Apache的方法有很多种,这里选择通过yum方式进行安装,但需要Linux系统能够连接互联网,执行如下命令,安装Apache。
[root@localhost ~]#yum install httpd
默认安装的Apache版本为httpd-2.4.6-31.el7.centos.x86_64,
通过yum安装的Apache,安装完成后,
默认配置文件主目录位于/etc/httpd下,
Apache的主配置文件/etc/httpd/conf/httpd.conf
Apache 模块位于/usr/lib64/httpd/modules 目录下,
Apache 模块的配置文件位于/etc/httpd/conf.modules.d 目录下,
Web 根目录位于/var/www/html/目录下,
日志文件位于/var/log/httpd/目录下。


在/usr/lib64/httpd/modules目录中,可以看到有很多Apache模块。
这么多模块都是Apache默认安装的,但这些模块大部分并不是我们需要的,因而,要确保httpd高效、安全地工作,需要禁用其中一些模块,以提高 Apache 的性能,减少占用的内存。
禁用方法很简单,编辑/etc/httpd/conf/conf.modules.d目录下的每个文件,删除或注释掉不需要的模块即可。
这里重点关注/etc/httpd 目录。在这个目录下,有个 conf.d 目录。默认情况下,/etc/httpd/conf.d 目录下所有以“.conf”结尾的文件都会被读取。
因此,很多情况下,根本不需要修改主配置文件/etc/httpd/conf/httpd.conf,而是在/etc/httpd/conf.d/下新建一个以“.conf”结尾的文件来完成各种配置。
要实现独立域名访问,可通过配置 Apache 的虚拟主机来实现,这里在/etc/httpd/conf.d/目录下新建一个文件ixdba.conf,内容如下

[root@localhost ~]# cat /etc/httpd/conf.d/ixdba.conf
<VirtualHost *:80>
ServerAdmin  admin@ixdba.net
ServerName  www.ixdba.net
ServerAlias  www
DocumentRoot /data/www/html/ixdba
<Directory "/data/www/html/ixdba/">
    Options  FollowSymLinks
    AllowOverride  All
    Require  all  granted
</Directory>
ErrorLog /var/log/httpd/ixdba_error.log
CustomLog /var/log/httpd/ixdba_access.log combined
</VirtualHost>
然后创建虚拟主机的文件夹。
[root@localhost ixdba]#mkdir -p /data/www/html/ixdba/
这个文件夹就是用来存放WordPress主程序的目录。接着将Apache设置为开机自启动模式,执行如下命令。
[root@localhost ixdba]#systemctl enable httpd
输出类似如下。
ln -s '/usr/lib/systemd/system/httpd.service' '/etc/systemd/system/multi-user.target.wants/httpd.service'
最后重新加载httpd,执行如下命令。
[root@localhost  ixdba]#systemctl reload httpd

systemctl start httpd.service
这样,Apache的安装和配置就完成了,将www.ixdba.net域名做好解析,然后访问这个地址,如果正确,就会就出现Apache的欢迎页面。
6.1.3. 安装并配置MariaDB(MySQL)
MariaDB是MySQL的一个分支,采用GPL授权许可,目前主要由开源社区在维护。MariaDB的目的是完全兼容MySQL,包括API和命令行,使之能轻松成为MySQL的代替品。目前,大型互联网用户以及Linux发行商纷纷抛弃MySQL,转投MariaDB阵营。MariaDB是目前最受关注的MySQL数据库衍生版,发展前景不可限量。CentOS从7.x版本开始默认使用MariaDB。 通过yum方式安装MariaDB非常简单,执行如下命令即可。
[root@localhost  app]#yum install mariadb-server mariadb
[root@localhost  app]#rpm -q mariadb mariadb-server
mariadb-5.5.41-2.el7_0.x86_64
mariadb-server-5.5.41-2.el7_0.x86_64
安装完成后,将MariaDB设置为开机自启动,操作如下。
[root@localhost app]#systemctl enable mariadb
输出类似如下。
ln -s '/usr/lib/systemd/system/mariadb.service' '/etc/systemd/system/multi-user.target.wants/mariadb.service'
接着,启动MariaDB,执行如下命令。
[root@localhost app]#systemctl start mariadb
最后,登录MariaDB,执行如下命令。
[root@localhost ~]#systemctl start mariadb.service
[root@localhost ~]#mysql -uroot -p
Enter password:
Welcome to the MariaDB monitor.  Commands end with ; or \g.
Your MariaDB connection id is 2
Server version: 5.5.60-MariaDB MariaDB Server

Copyright (c) 2000, 2018, Oracle, MariaDB Corporation Ab and others.

Type 'help;' or '\h' for help. Type '\c' to clear the current input statement.

MariaDB [(none)]>

[root@localhost ~]# systemctl stop mariadb
[root@localhost ~]# systemctl restart mariadb
[root@localhost ~]# systemctl status mariadb
● mariadb.service - MariaDB database server
   Loaded: loaded (/usr/lib/systemd/system/mariadb.service; enabled; vendor preset: disabled)
   Active: active (running) since 六 2019-02-23 14:36:37 CST; 6s ago
  Process: 41936 ExecStartPost=/usr/libexec/mariadb-wait-ready $MAINPID (code=exited, status=0/SUCCESS)
  Process: 41905 ExecStartPre=/usr/libexec/mariadb-prepare-db-dir %n (code=exited, status=0/SUCCESS)
 Main PID: 41935 (mysqld_safe)
   CGroup: /system.slice/mariadb.service
           ├─41935 /bin/sh /usr/bin/mysqld_safe --basedir=/usr
           └─42035 /usr/libexec/mysqld --basedir=/usr --datadir=/var/lib/mysql --plugin-dir=/usr/lib64/mysql/plugin --log-er...

2月 23 14:36:35 localhost.localdomain systemd[1]: Starting MariaDB database server...
2月 23 14:36:35 localhost.localdomain mariadb-prepare-db-dir[41905]: Database MariaDB is probably initialized in /var/li...ne.
2月 23 14:36:35 localhost.localdomain mysqld_safe[41935]: 190223 14:36:35 mysqld_safe Logging to '/var/lib/mysql/localh...rr'.
2月 23 14:36:35 localhost.localdomain mysqld_safe[41935]: 190223 14:36:35 mysqld_safe Starting mysqld daemon with datab...ysql
2月 23 14:36:37 localhost.localdomain systemd[1]: Started MariaDB database server.
Hint: Some lines were ellipsized, use -l to show in full.
MariaDB 通过内置的安全配置脚本可实现对数据库的安全保护,执行“/usr/bin/mysql_secure_installation”命令,加固MariaDB数据库,操作过程如下。
[root@localhost yum.repos.d]# mysql_secure_installation
NOTE:  RUNNING  ALL  PARTS  OF  THIS  SCRIPT  IS  RECOMMENDED  FOR  ALL  MariaDB
      SERVERS  IN  PRODUCTION  USE!   PLEASE  READ  EACH  STEP  CAREFULLY!
Enter  current  password  for  root  (enter  for  none):
#这里输入目前MariaDB数据库的root密码,默认是空
OK,  successfully  used  password,  moving  on...
Setting  the  root  password  ensures  that  nobody  can  log  into  the  MariaDB
root  user  without  the  proper  authorisation.
Set root password? [Y/n] y
#这里询问是否设置MariaDB数据库root的密码,输入"Y"给root用户设置一个新密码
New  password:
Re-enter  new  password:
Password  updated  successfully!
Reloading  privilege  tables..
 ...  Success!
By  default,  a  MariaDB  installation  has  an  anonymous  user,  allowing  anyone
to  log  into  MariaDB  without  having  to  have  a  user  account  created  for
them.   This  is  intended  only  for  testing,  and  to  make  the  installation
go  a  bit  smoother.   You  should  remove  them  before  moving  into  a
production  environment.
Remove anonymous users? [Y/n] y  #这里询问是否删除anonymous用户,输入"Y"删除
 ...  Success!
  Normally,  root  should  only  be  allowed  to  connect  from  'localhost'.   This
ensures  that  someone  cannot  guess  at  the  root  password  from  the  network.
Disallow root login remotely? [Y/n] y  #这里询问是否关闭root用户远程登录权限,输入"Y"
 ...  Success!
By  default,  MariaDB  comes  with  a  database  named  'test'  that  anyone  can
access.   This  is  also  intended  only  for  testing,  and  should  be  removed
before  moving  into  a  production  environment.
Remove test database and access to it? [Y/n] y   #这里询问是否删除测试数据库及其权限,输入"Y"
 -  Dropping  test  database...
 ...  Success!
 -  Removing  privileges  on  test  database...
 ...  Success!
Reloading  the  privilege  tables  will  ensure  that  all  changes  made  so  far
will  take  effect  immediately.
Reload privilege tables now? [Y/n] y   #这里询问是否重新载入授权表,输入"Y"
 ...  Success!
Cleaning  up...
All  done!   If  you've  completed  all  of  the  above  steps,  your  MariaDB
installation  should  now  be  secure.
Thanks  for  using  MariaDB!
至此,MariaDB数据库安装完成了。
6.1.4. 3.安装并配置PHP
这里仍以yum方式介绍如何安装和配置PHP。CentOS 7.1版本中,默认的PHP版本为PHP 5.4,可直接执行如下命令进行PHP以及相关模块的安装: 很多时候,对PHP环境要求较新的版本,例如,PHP 5.6环境,如果通过源码编译、安装,将会非常麻烦。这里提供一种通过yum工具安装最新PHP 版本的方法。首先,需要在系统上安装一个扩展yum源,即epel源,可从http://fedoraproject.org/wiki/EPEL 网站下载针对CentOS 7版本的epel文件,然后进行安装,操作过程如下。
# yum install epel-release
# rpm -ivh http://rpms.famillecollet.com/enterprise/remi-release-7.rpm
默认情况下,REMI是禁用的。要检查REMI源是否已经成功安装,可以执行如下命令。
[root@localhost ~]# yum repolist disabled | grep remi
要搜索REMI仓库中是否有可用的包,可以执行如下命令。
[root@localhost ~]# yum --enablerepo=remi list php
或者
[root@localhost ~]# yum --enablerepo=remi-php56 list php
通过这种方式,就可以很方便地安装自己需要的PHP版本。例如,要安装PHP,5.6版本,执行如下命令即可。
6.1.5. 4.安装phpMyAdmin
phpMyAdmin是一个用PHP编写的软件工具,可以通过Web方式控制和操作MySQL数据库, 管理者可以通过Web接口的方式远程管理MySQL数据库 可以很方便地建立、修改、删除数据库及表,通过phpMyAdmin可以使MySQL数据库的管理变得十分简单和高效。 下面通过yum方式安装phpMyAdmin,操作过程如下。
yum install --enablerepo=remi --enablerepo=remi-php56 phpmyadmin
yum会自动寻找依赖软件包,然后自动完成phpMyAdmin的安装。 phpMyAdmin的默认安装目录是/usr/share/phpMyAdmin, 同时会在Apache的配置文件目录中自动创建虚拟主机配置文件/etc/httpd/conf.d/phpMyAdmin.conf。 由于这里介绍的 Apache版本是Apache 2.4.6,所以需要对phpMyAdmin.conf文件做些修改, 在phpMyAdmin.conf文件中找到类似下面的内容。
Allow  from  127.0.0.1
Allow  from  ::1
将这些内容修改为:
Require all granted
这里“Require all granted“的含义类似于Apache之前版本中的“Allow from all”,表示任何地方都可以访问,如果不对这个设置做修改,将在访问的时候出现403错误。 然后,重新启动httpd服务,执行如下命令。
[root@localhost ~]# systemctl restart httpd
最后,通过地址http://www.ixdba.net/phpMyAdmin/ 访问phpMyAdmin,
设置登录语言为中文,登录用户名root,
密码就是上面通过mysql_secure_installation设置的那个密码,
即可登录phpMyAdmin。
6.1.6. 5.部署WordPress程序
WordPress 的官网为 https://wordpress.org,中文官网为 http://cn.wordpress.org/,
读者可以在这两个网站下载WordPress安装程序。
目前最新的稳定版本为WordPress 4.2.2,这里下载的是中文版本wordpress-4.2.2-zh_CN.zip,
把解压后的程序上传到前面设置虚拟服务器时设定的文件夹/data/www/html/ixdba下。
  mv wordpress-5.0.3-zh_CN.zip /data/www/html/ixdba/
  cd /data/www/html/ixdba/
  mv wordpress-5.0.3-zh_CN.zip ../
  unzip wordpress-5.0.3-zh_CN.zip
  mv wordpress/* ixdba/
默认情况下,httpd服务的运行用户为apache。为了安全起见,
我们添加另一个普通用户作为httpd服务的运行账号,执行如下命令添加一个系统用户。
 [root@localhost ~]# useradd ixdba
[root@localhost ~]# passwd ixdba
用户创建完成后,还需要将 WordPress 程序中所有文件都修改为 ixdba 用户权限,执行如下操作。
[root@localhost ~]# chown -R ixdba:ixdba /data/www/html/ixdba
最后,修改/etc/httpd/conf/httpd.conf文件,找到如下内容。
User  apache
Group  apache
修改为:
User  ixdba
Group  ixdba
这两个选项设置httpd服务的运行用户和组,这里修改为ixdba用户和ixdba组。 为了运行WordPress程序,还需要在数据库中提前创建一个用于存储WordPress数据的库。这里将WordPress的数据库命名为cmsdb。下面开始创建数据库。 先登录MariaDB数据库,执行如下操作。
[root@localhost conf.d]# mysql -uroot -padmin#123
Welcome to the MariaDB monitor.  Commands end with ; or \g.
Your MariaDB connection id is 43
Server version: 5.5.60-MariaDB MariaDB Server

Copyright (c) 2000, 2018, Oracle, MariaDB Corporation Ab and others.

Type 'help;' or '\h' for help. Type '\c' to clear the current input statement.

MariaDB [(none)]> create database cmsdb;
Query OK, 1 row affected (0.00 sec)

MariaDB [(none)]> grant  all  on  cmsdb.*  to  'ixdba'  identified  by  'ixdbapassword';
Query OK, 0 rows affected (0.00 sec)

MariaDB [(none)]> flush privileges;
Query OK, 0 rows affected (0.00 sec)


chown -R ixdba:ixdba ixdba/
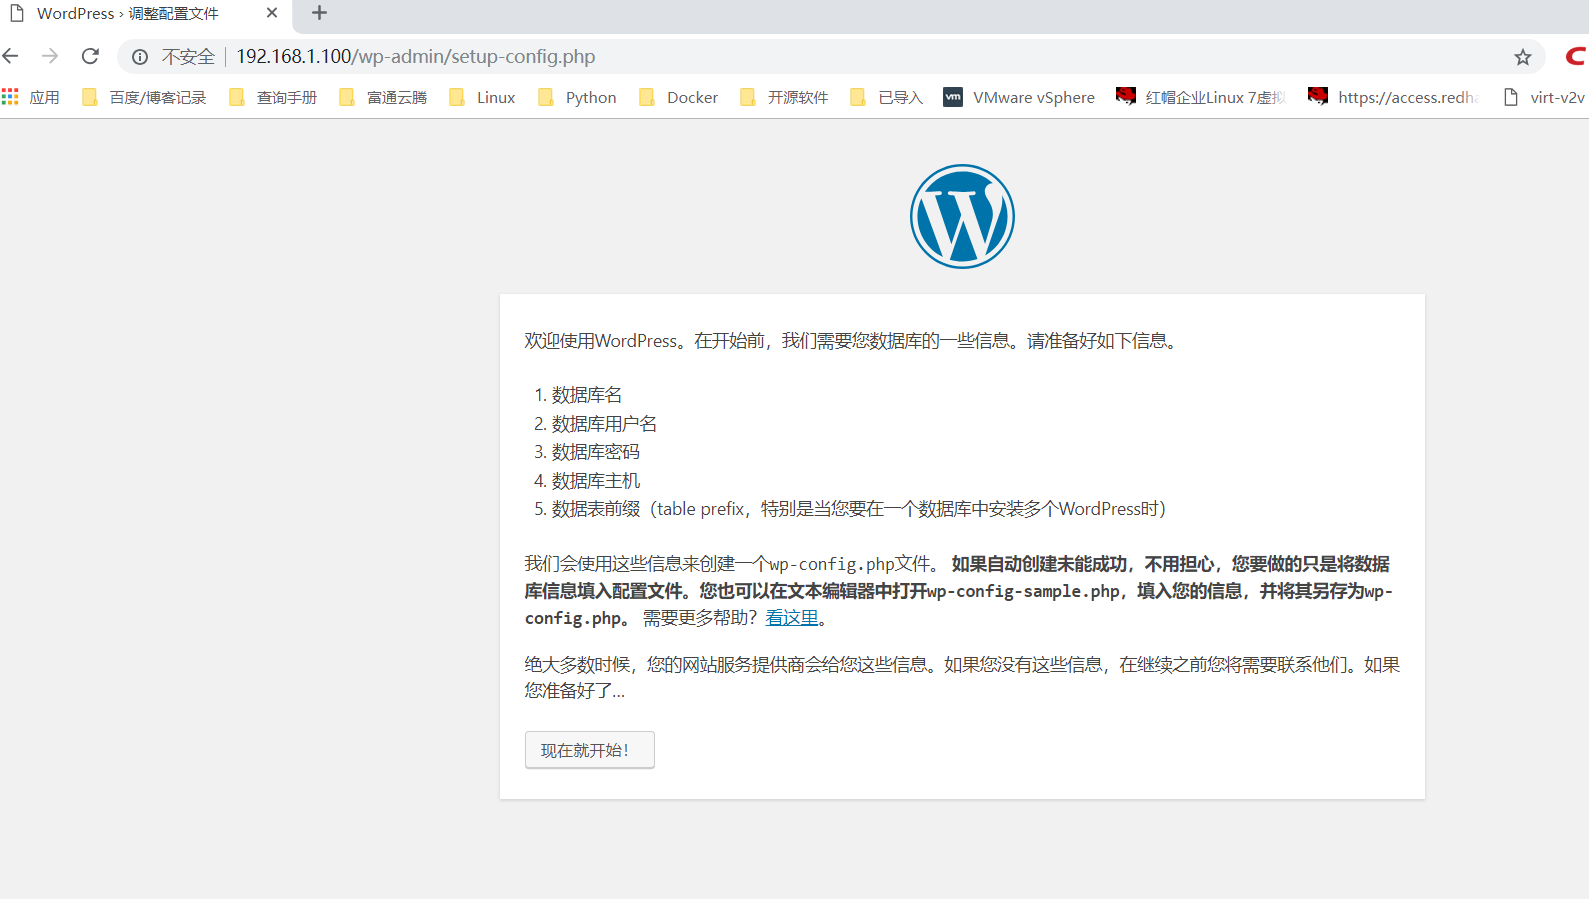
这个就是WordPress的安装向导界面, 安装过程会提示输入连接数据库的地址、库名、用户名、密码、表前缀, 数据库地址默认是 localhost,保持默认地址即可, 库名、用户名和密码分别为之前设置的 cmsdb、ixdba 和 ixdbapassword, 数据库表前缀保持默认前缀即可。根据向导依次进行操作即可完成安装。
6.1.7. 测试LAMP环境安装的正确性
在LAMP 环境搭建起来之后,如何测试PHP环境的正确性呢?如何知道安装了哪些模块,缺少了哪些模块?非常简单!只需要几行代码就能搞定,请看下面一段代码。
<?php phpinfo(); ?>
将这段代码保存的一个文件中,命名为phpinfo.php,然后放到Web服务的根目录下。通过浏览器访问http://ip/phpinfo.php;

在这个页面中,显示了PHP的各种信息。通过这个页面,读者就能清晰地知道PHP环境中都安装了哪些模块,哪些模块没有安装,这对于部署或配置LAMP环境来说至关重要